Candle Pruning Pine Bonsai: Pinching vs Decandling Explained

This post contains affiliate links. As an Amazon Associate, OurBonsai earns from qualifying purchases at no extra cost to you. Read our disclosure.
In this guide
- What are pine candles?
- Single-flush vs multi-flush pines
- Pinching candles on single-flush pines
- Decandling multi-flush pines
- Balancing strong and weak areas
- A note on white pine and mugo pine
- Tools you need
- Common candle pruning mistakes
- Developing vs refining a pine
- FAQ: candle pruning pine bonsai
- Final thoughts
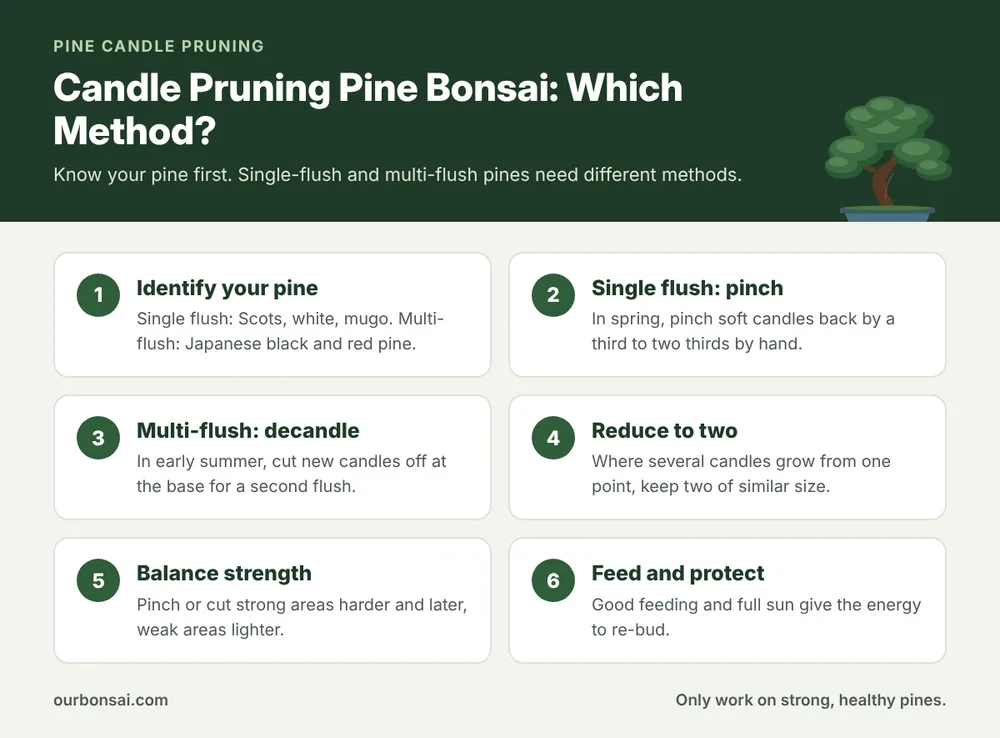
Candle pruning pine bonsai means controlling the new spring shoots of a pine, called candles because they stand upright like candles before their needles open. It is the main way to keep pine bonsai compact, shorten needles and build fine branching. But there is no single method. The right technique depends on your species: single-flush pines like Scots pine, white pine and mugo pine are pinched by hand in spring, while multi-flush pines like Japanese black and red pine are decandled, with the whole candle cut off in early summer to force a second, shorter flush.
This guide explains the difference, how to tell which group your pine belongs to, and step-by-step methods for both, plus how to balance strong and weak areas.
What are pine candles?
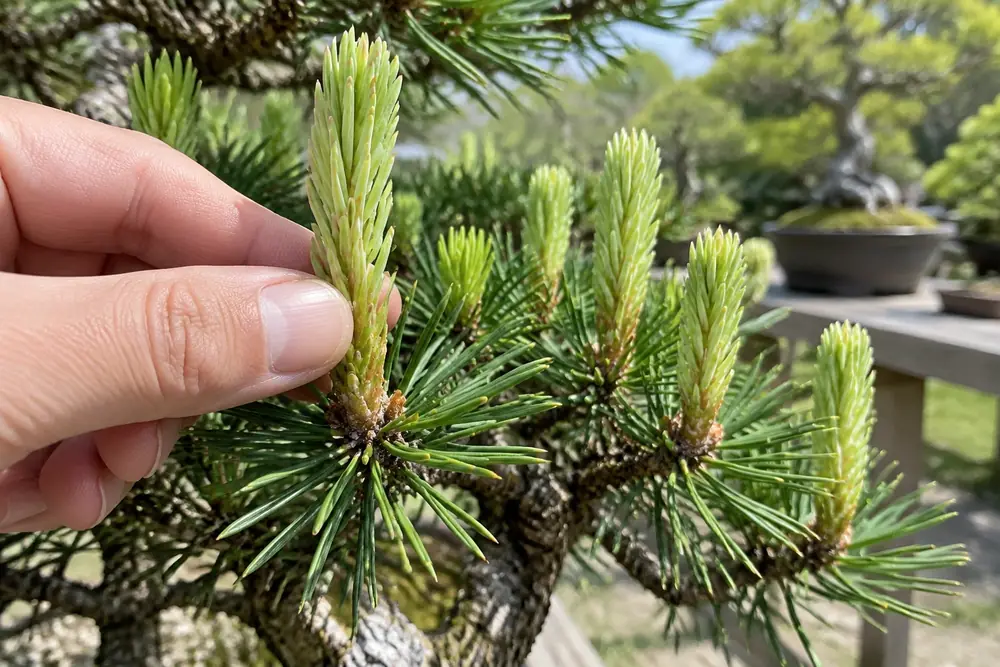
In spring, each bud at the tip of a pine shoot extends into a candle: a soft, upright shoot with tightly packed needles that have not yet opened. Over a few weeks the candle lengthens, the needles separate and harden, and it becomes the new year’s growth. Left alone, candles grow long, with long needles, and the tree quickly looks coarse. Candle pruning keeps that growth in proportion.
Single-flush vs multi-flush pines
| Group | Examples | Main candle technique |
|---|---|---|
| Single-flush | Scots pine, Japanese white pine, mugo pine, ponderosa, lodgepole | Pinching in spring |
| Multi-flush | Japanese black pine, Japanese red pine, some Mediterranean pines | Decandling in early summer |
Single-flush pines produce one set of shoots per year. If you remove the whole candle, the tree will not produce another that year, so you shorten the candles instead.
Multi-flush pines can push a second set of buds after the first candles are removed. Decandling takes advantage of that to produce shorter needles and more branches. The Wikipedia overview of the genus Pinus describes the variety of growth habits across pine species.
Pinching candles on single-flush pines
When
In spring, when the candles have extended but the needles have not yet separated, usually over two to three weeks in April to May in the Northern Hemisphere. Candles on the strong top and outer branches open first.
How
- Grip the candle between finger and thumb.
- Pinch or snap off one third to two thirds of the candle. Take more from strong candles and less from weak ones.
- Use your fingers rather than scissors on soft candles where possible, since cutting through needles leaves brown tips. On stiffer candles, sharp scissors are fine.
- Work over several sessions as candles reach the right stage, strongest areas first.
- Reduce clusters. Where three or more candles grow from one point, remove the extras and keep two.
New buds form at the base of the pinched candle over the summer and will open next spring, building ramification year by year.
Decandling multi-flush pines
When
Early summer, once the candles have fully extended and the new needles are just starting to separate, usually June. Decandling belongs to a yearly cycle that also includes thinning the new shoots in late summer and plucking old needles in autumn. If your tree is still young, read when to start pruning bonsai first, because decandling a tree that is still developing slows it down.
How
- Cut each new candle off at its base with sharp scissors, leaving a tiny stub.
- Start with weak areas, the lower and inner branches, and cut the strong top and outer areas a week or two later, giving them less time to regrow.
- Wait for the second flush. Within a few weeks, several new buds form at each cut and grow into shorter shoots with shorter needles.
- Thin the new shoots in late summer to two per point.
Decandle only strong, healthy trees. A weak pine may not re-bud, and can decline badly.
Balancing strong and weak areas
Pines naturally grow strongest at the top and outer tips, and weakest low and inside. Left alone, the lower branches fade and eventually die. Candle pruning is your main tool to rebalance:
- Strong areas: pinch harder (two thirds), or decandle later, so they lose more energy.
- Weak areas: pinch lightly (one third), or not at all, or decandle earlier, so they keep more energy.
- Autumn needle plucking: leave more needles on weak branches and fewer on strong ones.
- Full sun: make sure the lower and inner branches get light.
Over a few years this evens out growth and keeps lower branches healthy.
A note on white pine and mugo pine
Japanese white pine is slower and more delicate than black pine. Many growers pinch its candles very lightly, or simply remove the extra candles in a cluster and leave the rest, because white pine needles are naturally short and the tree weakens if pinched too hard. Mugo pine, on the other hand, is vigorous and back-buds better than most single-flush pines, so it tolerates firmer pinching, and its candles can even be cut back to a few needles in late spring to encourage buds lower on the shoot. Whatever the species, watch how the tree responds over a season before increasing the intensity.
Tools you need
- Your fingers for soft candles.
- Fine bonsai scissors for firmer candles and decandling.
- Tweezers for plucking needles in tight spots.
Our guide to the best Japanese bonsai tool kit lists sets with all three, or browse bonsai scissors and tweezers sets.
Common candle pruning mistakes
- Decandling a single-flush pine. It will not re-bud that year and can lose the branch.
- Pinching too early, before candles extend, which removes the growth the tree needs to recharge.
- Cutting through hard needles with scissors, leaving brown tips.
- Treating every area the same, so strong areas keep getting stronger.
- Candle pruning a weak or newly repotted tree.
- Keeping the pine indoors. All pines need full sun outdoors and a cold winter. Our guide to types of evergreen bonsai trees explains why.
Developing vs refining a pine
Candle pruning is a refinement technique. On a young pine that you are still growing for trunk thickness, let candles grow freely for a few years. Only start pinching or decandling once the trunk and main branches are where you want them. The right soil and feeding support all of this growth; our guide to the best soil for Japanese black pine bonsai applies to most pines.
FAQ: candle pruning pine bonsai
What is the difference between pinching and decandling?
Pinching shortens the candle in spring and is used on single-flush pines. Decandling removes the whole candle in early summer and is used on multi-flush pines like Japanese black pine.
Can I decandle a Scots pine?
No. Scots pine is single-flush and will not reliably produce a second set of buds.
When should I pinch pine candles?
In spring, when the candles have extended but before the needles separate.
How many candles should I leave per branch tip?
Two candles of similar size at each point gives balanced, forked branching.
Final thoughts
Candle pruning pine bonsai is simple once you know your species: pinch single-flush pines in spring, decandle multi-flush pines in early summer, reduce clusters to two, and use the timing to weaken strong areas and favor weak ones. Do it only on strong trees in full sun, and your pine will develop shorter needles and denser branching every year. For a related species, our loblolly pine bonsai care guide covers a pine native to North America.