Bonsai Branch Selection: Which Branches to Keep and Which to Cut
This post contains affiliate links. As an Amazon Associate, OurBonsai earns from qualifying purchases at no extra cost to you. Read our disclosure.
In this guide
Bonsai branch selection is the process of deciding which branches stay on the tree and which come off, and it is the most important styling decision you will make. The branches you keep define the shape of the tree for years, and once a branch is cut, it cannot be put back. The basic rules are simple: first remove branches that cross, grow from the same point, point straight at the viewer or grow straight up or down; then choose a set of main branches that alternate around the trunk, starting about a third of the way up, getting thinner and closer together toward the top.
This guide explains how to plan before cutting, which branches to remove first, how to choose the main branches, and the timing that suits different trees.
Before you choose: front and trunk line
Branch selection always comes after two other decisions:
- The front. Turn the tree slowly on a turntable and find the side that shows the best trunk movement, a good root spread and the most interesting shape. The front is where the trunk leans slightly toward the viewer and does not hide behind branches.
- The trunk line and apex. Decide where the top of the tree will be. Sometimes the existing top is replaced by a lower branch to improve taper.
Only when those are clear can you judge which branches help the design. Our guide to juniper bonsai styles for beginners shows how different styles change the branch layout.
Branches to remove first
These branches are almost always removed, whatever the style:
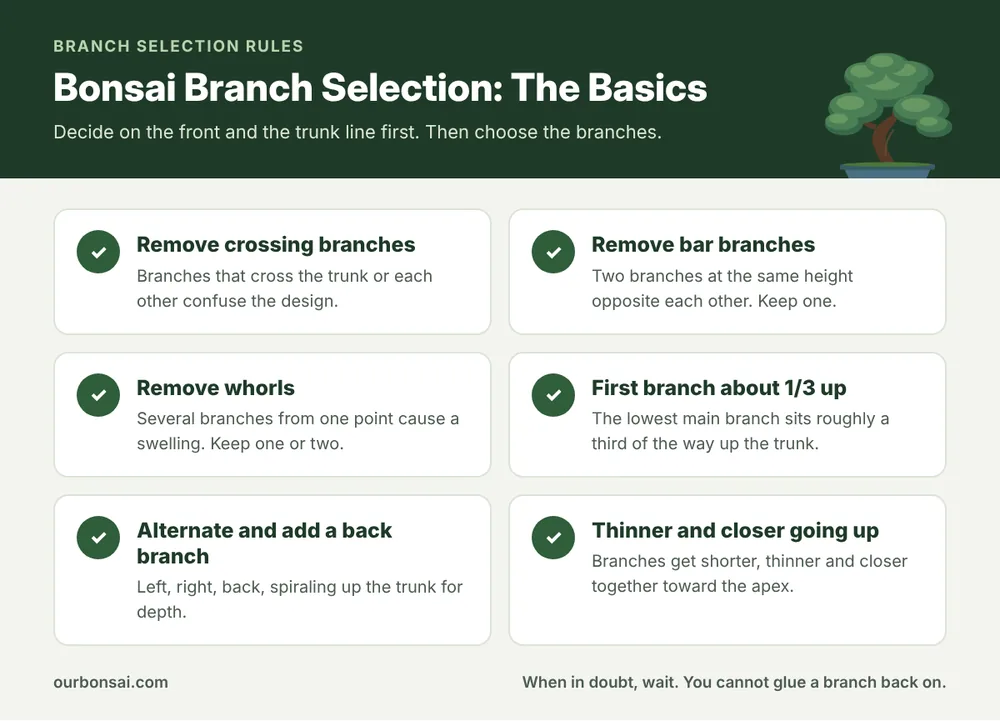
- Crossing branches that cross the trunk or another branch.
- Bar branches, two branches leaving the trunk at the same height on opposite sides. They look unnatural and cause a swelling. Keep the better one.
- Whorls, three or more branches from the same point, common on pines and junipers. Reduce to one, or at most two.
- Front branches low on the trunk that hide the trunk from the viewer. Higher up, short front branches are fine and add depth.
- Branches growing straight up or straight down from other branches.
- Inner branches growing back toward the trunk.
- Branches on the inside of a trunk curve. Branches look best on the outside of bends.
- Dead, weak or damaged branches.
How to choose the main branches
First branch
The first (lowest) main branch is usually placed about one third of the way up the trunk, on the outside of a curve, to the left or right. It is usually the longest and thickest branch on the tree. Some designs place the first branch a little lower on short, stout trees.
Second branch
The second branch sits a little higher, on the opposite side to the first, and is slightly shorter and thinner.
Back branch
The third branch grows toward the back, between the first two, giving the tree depth when seen from the front. Without back branches, a bonsai looks flat.
Higher branches
Continue the pattern upward in a loose spiral: left, right, back. Each branch is a little shorter and thinner than the one below, and the gaps between them get smaller toward the apex. Near the top, branches become small pads that form a rounded crown.
| Branch | Position | Size |
|---|---|---|
| First | About 1/3 up, left or right, outside of a curve | Longest and thickest |
| Second | Opposite side, a little higher | Slightly shorter |
| Back | Behind, between the first two | Medium, gives depth |
| Upper branches | Spiraling upward, closer together | Shorter and thinner |
| Apex | Top | Many fine twigs in a soft dome |
These are guidelines, not strict rules. Real trees vary, and a design that follows the tree’s natural character often looks better than one forced into a textbook pattern.
Branch selection by style
The basic rules shift a little depending on the style you choose:
- Formal and informal upright: follow the classic left, right, back spiral closely. The first branch is the most important.
- Slanting: the first branch usually grows on the side opposite the lean, to balance the tree visually.
- Cascade and semi-cascade: branches are chosen to follow the trunk down over the pot edge, with fewer branches near the top.
- Broom: many branches leave the trunk at roughly the same height, which breaks the bar branch rule on purpose to make a fan-shaped crown. It suits elms and zelkovas.
- Literati: very few branches, all high on a long, slender trunk.
Decide on the style before you start cutting, because a branch that is wrong for one style may be essential for another.
Practical tips for branch selection
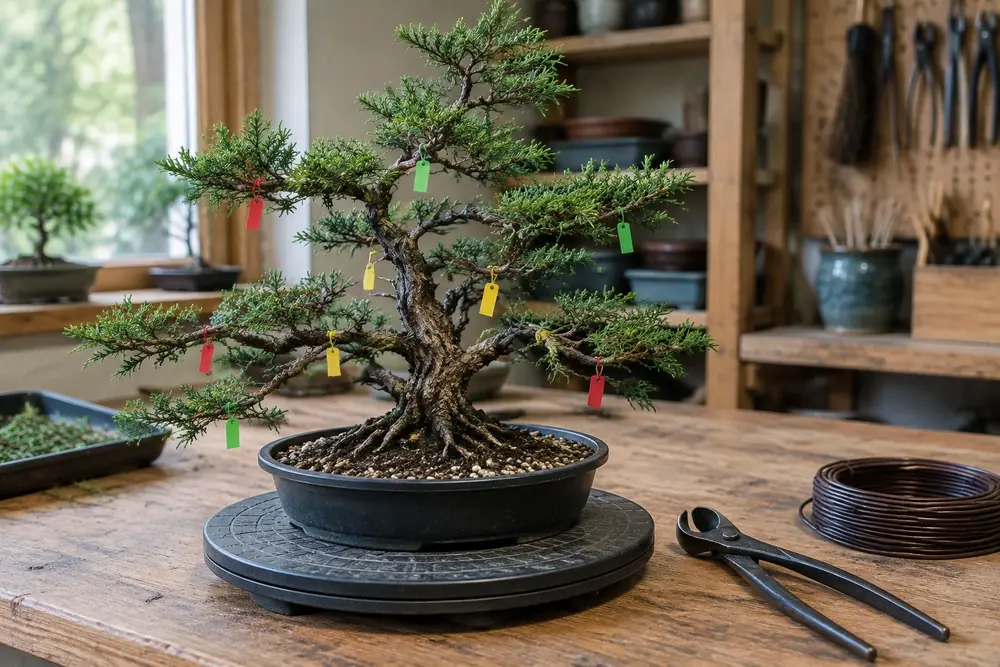
- Tag before you cut. Put a small piece of tape or a tag on branches you plan to remove, step back, and check the tree from the front and sides.
- Cut in stages. Remove the obvious problem branches first. Leave doubtful ones for a later session; you can always cut later, but you cannot replace a branch.
- Keep spares on young trees. An extra branch can thicken the trunk or become a backup if a chosen branch dies.
- Use a concave cutter for clean cuts close to the trunk that heal flat. Our concave cutter review explains why. You can also browse bonsai concave cutters.
- Consider jin. On junipers and pines, an unwanted branch can be stripped of bark and kept as deadwood (jin) instead of being cut off, adding age and character.
When to do branch selection
| Tree type | Best time |
|---|---|
| Deciduous (maple, elm) | Late winter before bud break, when the structure is visible |
| Conifers (juniper, pine) | Late autumn to winter |
| Tropical (ficus, Fukien tea) | Late spring to early summer |
Our guide to when to prune deciduous bonsai covers deciduous timing in more detail, and when to start pruning bonsai helps you decide if a young tree is ready.
Common branch selection mistakes
- Cutting before choosing the front.
- Keeping two branches at the same height because both look nice.
- Removing all the back branches, so the tree looks flat.
- Keeping thick branches high up, which ruins the taper.
- Removing too much in one session, which weakens the tree.
The Wikipedia article on bonsai aesthetics summarizes the traditional branch rules that most bonsai styles follow.
FAQ: bonsai branch selection
How many branches should a bonsai have?
There is no fixed number. Most small to medium trees have five to nine main branches plus the apex, depending on height and style.
Should I remove branches all at once?
No. Remove obvious problems first, then refine over one or two more sessions as you see how the tree responds.
Can I keep a branch at the front?
Low down on the trunk, usually not, because it hides the trunk. Higher up, short front branches add depth and look natural.
What do I do with a branch I am unsure about?
Leave it. Wait a season, look again, and only cut when you are sure.
Final thoughts
Bonsai branch selection becomes much easier when you follow a clear order: choose the front, set the trunk line, remove the obvious problem branches, then pick main branches that alternate around the trunk and get smaller toward the top. Take your time, tag before you cut and work in stages. The branches you choose today shape your bonsai for decades, so a little patience goes a long way. For species-specific ideas, see our guide to boxwood bonsai styles, or start with our bonsai care guide.