Juniper Bonsai Styles For Beginners Step By Step Complete Guide


Quick answer: the best juniper bonsai styles for beginners are informal upright (moyogi), slanting (shakan) and semi-cascade (han-kengai). They follow the natural shape of most nursery junipers and need only basic pruning and wiring. Once you are comfortable, try cascade, windswept, literati or a small forest planting.
In this guide
- Why juniper is a good tree for beginners
- Juniper bonsai styles explained
- What is the best shape for a juniper bonsai?
- How to style a juniper bonsai step by step
- Juniper bonsai pruning basics
- Pot, soil and watering for styled junipers
- What is the best type of bonsai tree for beginners?
- Frequently asked questions
- Conclusion
Junipers are the most popular trees for learning bonsai styles: they are hardy, their branches bend easily with wire, and they are perfect for deadwood. Below you will find each style explained, a step-by-step guide to the first styling, and the pruning basics you need.
Why juniper is a good tree for beginners
- Forgiving: tough, cold-hardy and tolerant of mistakes, as long as it lives outdoors.
- Easy to wire: young branches bend well and hold their shape after one season.
- Cheap material: nursery junipers such as Juniperus procumbens ‘Nana’ are easy to find.
- Deadwood: jin and shari look natural on junipers.
Good beginner junipers are Japanese garden juniper (J. procumbens ‘Nana’), Shimpaku (J. chinensis) and other compact forms of Chinese juniper. Remember junipers are outdoor trees: see Japanese juniper bonsai care before you start.
Juniper bonsai styles explained
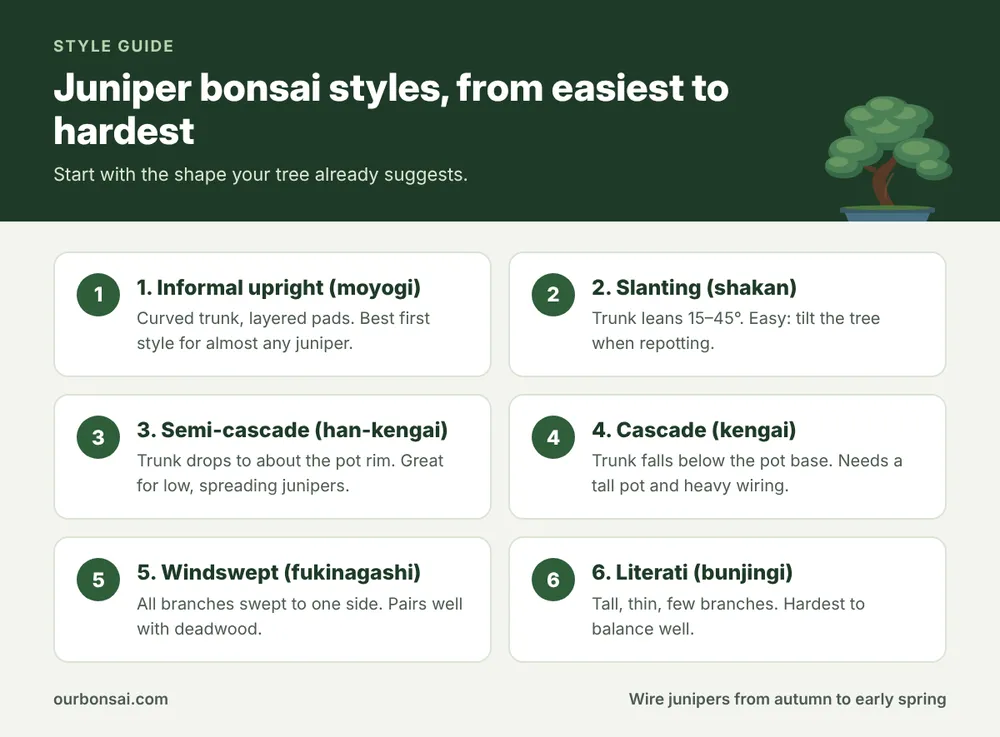
Informal upright (moyogi)
The trunk rises with gentle S-curves, and branches form layered pads that get smaller towards the top. It is the most common bonsai style and suits almost every juniper. Beginners should start here.

Formal upright (chokkan)
A straight, tapering trunk with balanced branches. It looks simple but is hard to do well with junipers, because most nursery junipers have curved or leaning trunks.
Slanting (shakan)
The trunk leans at about 15–45 degrees, as if shaped by wind or a slope. You can create it simply by changing the planting angle when repotting.
Semi-cascade (han-kengai)
The trunk grows out sideways and dips to about the level of the pot rim. Low, spreading junipers like procumbens ‘Nana’ are perfect for this.
Cascade (kengai)
The trunk falls below the base of the pot, like a tree growing down a cliff. It needs heavier wiring and a tall pot; see our guide to the {L(‘tall-bonsai-pot-for-cascade’,’best tall pots for cascade bonsai’)}.

Windswept (fukinagashi)
All branches are swept to one side as if by a constant wind. Combine it with jin (dead branches) for a dramatic mountain-tree look.
Literati (bunjingi)
A tall, thin, often twisting trunk with only a few branches near the top. It looks minimal but is hard to balance; try it once you have experience.
Twin trunk (sokan) and forest (yose-ue)
Twin trunk has two trunks from one base, one taller than the other. A forest uses several young junipers planted in one shallow tray. Both are good ways to use cheap young plants.
Broom (hokidachi)
A rounded crown on a straight trunk. It is a classic style for elms and zelkovas but does not suit junipers well, because junipers do not form the fine, fan-like branching it needs.
What is the best shape for a juniper bonsai?
The best shape is the one your tree already suggests. Look at the trunk: if it curves, choose informal upright; if it leans, choose slanting; if it spreads low, choose semi-cascade or cascade. Working with the tree instead of against it gives faster, more natural results.
How to style a juniper bonsai step by step
- Check the tree is healthy. Only style a strong, actively growing juniper with firm, green foliage. Never style a stressed or recently repotted tree.
- Choose the front. Turn the tree slowly and pick the side where the trunk shows the best movement and taper and the roots spread evenly.
- Clean the base. Remove soil from the top roots and the lower trunk so you can see the structure.
- Pick the main branches. Keep branches on the outside of curves and spaced around the trunk. Remove crossing branches, branches growing straight towards the viewer, and one of any two branches growing from the same point.
- Thin, but leave green. Remove weak inner shoots and growth hanging below branches. Never remove all the foliage from a branch: it will die.
- Wire. Wire the trunk first if needed, then main branches, then smaller ones. Use copper or aluminium wire about one third the thickness of the branch, wound at 45 degrees. Bend slowly. See our bonsai wire guide.
- Arrange the pads. Bend branches slightly down from the trunk and lift the tips, then spread the foliage into flat pads with space between them for light.
- Aftercare. Keep the tree in light shade for 2 weeks, water normally, and do not repot or prune hard for the rest of the season.

Juniper bonsai pruning basics
- Tools: sharp bonsai scissors, concave cutters for branches and jin pliers for deadwood.
- Cut, don’t pinch: pinching juniper tips with fingers makes them turn brown; use scissors.
- When: structural styling from autumn to early spring; maintenance trimming of long shoots from late spring to late summer.
- How much: remove no more than about a third of the foliage at once.
If foliage turns brown after styling, read why a juniper bonsai turns brown.

Pot, soil and watering for styled junipers
Choose a pot that matches the style: shallow ovals or rectangles for upright styles, a medium-depth pot for semi-cascade, and a tall pot for cascade. Use a gritty, free-draining juniper soil mix, keep the tree in full sun, and water whenever the top of the soil is just dry.
What is the best type of bonsai tree for beginners?
Juniper is one of the best for outdoor growers. If your tree will live indoors, choose a ficus or jade instead. Compare options in our list of the best trees to make bonsai.

Frequently asked questions
What is the easiest juniper bonsai style?
Informal upright. It follows the natural shape of most junipers and needs only basic wiring.
When should I style my juniper bonsai?
Do major styling and wiring from autumn to early spring, when the tree is less active. Avoid heavy work in hot summer weather.
How long should wire stay on a juniper?
Usually one growing season, about 3–9 months. Check every few weeks and remove it before it bites into the bark.
Can I style a juniper in the first year I buy it?
Yes, if it is healthy. Many people do a first styling right away, but wait at least a season before repotting a freshly styled tree.
Conclusion
Start with an informal upright, slanting or semi-cascade style, choose the front carefully, keep green on every branch, and wire gently. Junipers forgive a lot, so each styling session teaches you something. For the background of these Japanese style names, see the history of bonsai in Japan.