How to Repot Bonsai Trees: Step-by-Step Beginner Guide

This post contains affiliate links. As an Amazon Associate, OurBonsai earns from qualifying purchases at no extra cost to you. Read our disclosure.
In this guide
Learning how to repot bonsai is one of the most important skills in the hobby. A bonsai lives in a small pot with a limited amount of soil. Over time, roots fill the pot, the soil breaks down, and water and air can no longer reach the roots properly. Repotting refreshes the soil, trims the roots and keeps the tree healthy for decades. It looks intimidating the first time, but it follows a simple sequence.
This step-by-step guide covers when to repot, what you need, how to prune the roots, how to secure the tree and how to care for it afterward.
When should you repot a bonsai?
Signs it needs repotting
- Water runs off the surface or drains very slowly.
- The pot dries out much faster than it used to.
- Roots grow out of the drainage holes or lift the tree.
- Lifting the tree shows a dense mat of roots circling the pot.
- Growth has slowed and leaves look pale.
How often
| Tree type | Typical interval |
|---|---|
| Young deciduous trees | Every 1 to 2 years |
| Mature deciduous trees | Every 2 to 4 years |
| Tropical trees | Every 2 to 3 years |
| Junipers and pines | Every 3 to 5 years |
Best time of year
- Temperate deciduous and conifers: Early spring, as buds swell and before leaves open.
- Tropical trees: Late spring to early summer, when it is warm. See our guide on the best time to repot tropical bonsai.
- Some deciduous trees can be repotted in autumn. Our guide to repotting bonsai in autumn explains which.
Only repot healthy trees. A weak tree should be left to recover first.
What you need
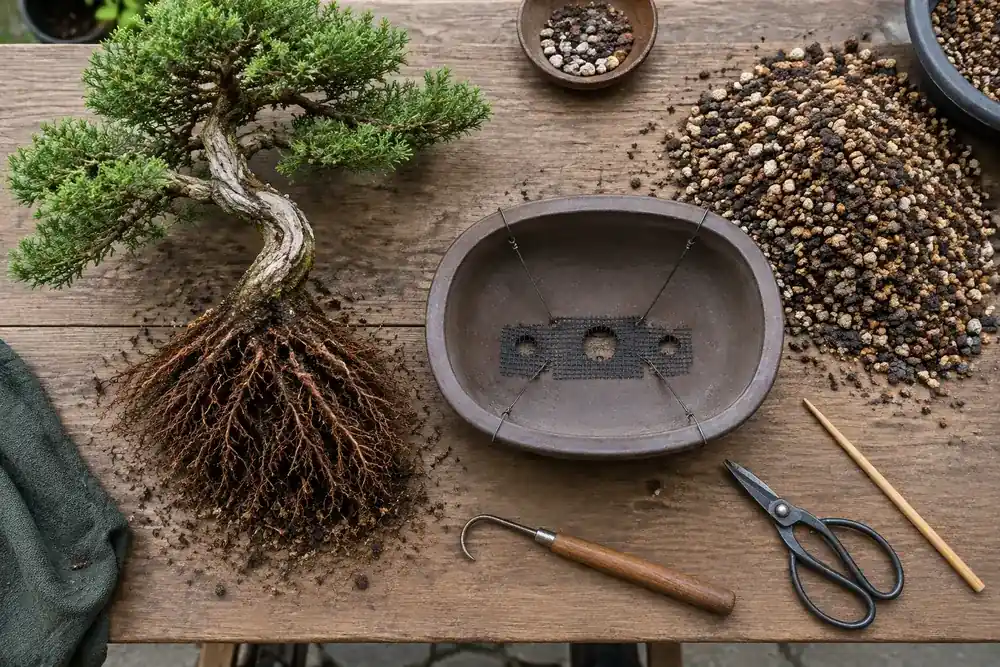
- Root hook or rake to comb out roots.
- Root scissors or sturdy bonsai shears.
- Wire cutters and aluminum wire (1.5 to 2.5 mm) to tie the tree in.
- Drainage mesh to cover the pot holes.
- Chopsticks to work soil into the roots.
- Fresh, sieved bonsai soil. See our guides to the best bonsai soil and soil mix ratios.
- A pot of the right size with good drainage.
- A repotting mat or tray to keep things tidy. Our guide to the best bonsai repotting mat shows options.
Our full list of bonsai repotting tools explains each tool. Many beginners start with a bonsai repotting tool kit on Amazon.
How to repot bonsai step by step
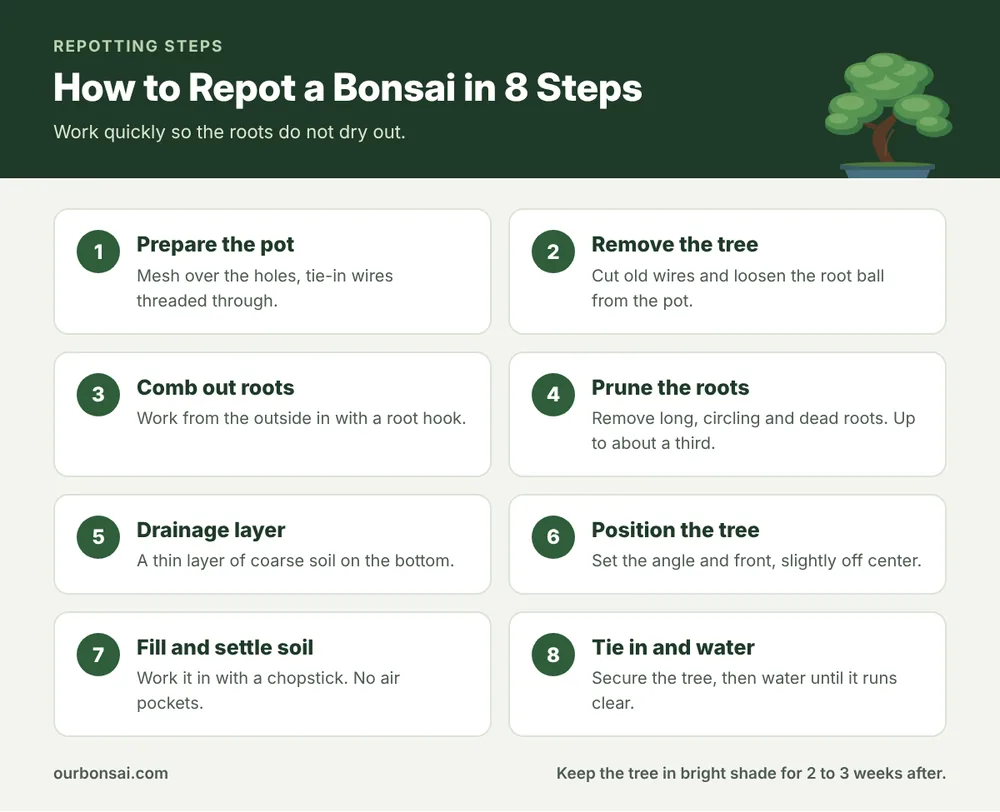
Step 1: Prepare the pot
Cut pieces of mesh slightly larger than the drainage holes and fix them with small wire staples. Thread one or two lengths of tie-in wire up through the holes so the ends stick up inside the pot, ready to wrap over the root ball. Our guide to bonsai repotting wire explains sizes and methods.
Step 2: Remove the tree
Water the tree the day before so the root ball is moist but not soggy. Cut any old tie-in wires under the pot. Run a knife or root sickle around the inside edge to free the roots, then lift the tree out by the base of the trunk.
Step 3: Comb out the roots
Use the root hook to gently tease out the roots, working from the outside of the root ball inward and from the bottom up. Remove old, broken-down soil as you go. Leave a core of soil under the trunk, especially on conifers.
Step 4: Prune the roots
Cut back long roots, roots circling the outside, and roots growing straight down. Remove dead or rotten roots (dark and mushy). On a healthy tree, removing up to about a third of the root mass is usually safe. Conifers and weak trees need lighter pruning.
Step 5: Add a drainage layer
Place a thin layer of the coarsest soil particles on the bottom of the pot, then a small mound of normal soil where the tree will sit.
Step 6: Position the tree
Set the tree on the mound. Choose the front, adjust the planting angle, and place it slightly off center in rectangular and oval pots. The root flare should sit at or just above the rim level.
Step 7: Fill and settle the soil
Add soil around the roots. Use a chopstick to work it gently into every gap, moving the chopstick up and down in small strokes. This removes air pockets, which can dry out roots. Do not press the soil down hard.
Step 8: Tie in and water
Twist the tie-in wires over the root ball and tighten until the tree does not move. Then water thoroughly, until the water running from the drainage holes is clear.
Aftercare after repotting
- Bright shade for two to three weeks. No hot afternoon sun.
- Shelter from wind and frost.
- Water carefully. Water when the surface begins to dry. Do not keep the soil soggy.
- No fertilizer for three to six weeks. Then start at half strength.
- No heavy pruning or wiring until the tree is growing well.
If the tree droops a little in the first days, that is common. Some trees sit still for a few weeks while new roots form.
Choosing the right pot size
As a general guide, the pot length is about two thirds of the tree’s height (or the width of the canopy for wide trees), and the depth is roughly equal to the trunk thickness at the base. Young trees in development benefit from larger training pots; refined trees go into smaller display pots. Our guide to Tokoname training pots shows good options for development.
Repotting different types of trees
- Deciduous trees (maples, elms): the most tolerant. Comb out fully and prune roots firmly on healthy trees.
- Tropical trees (ficus, schefflera): recover very fast in warmth. Repot when nights are reliably warm.
- Junipers: remove only part of the old soil each time, often half the root ball, and keep the core around the trunk.
- Pines: the most careful approach. Keep some old soil, which contains beneficial fungi that help the roots, and prune lightly.
- Azaleas: fine, dense roots that are best cut with scissors or a saw rather than combed. Use acidic kanuma soil.
Common repotting mistakes
- Repotting at the wrong time of year.
- Letting exposed roots dry out while you work. Mist them if it takes long.
- Using ordinary potting compost.
- Leaving air pockets under the trunk.
- Not tying the tree in, so it rocks and breaks new roots.
- Fertilizing straight away.
FAQ: how to repot bonsai
Can I repot a bonsai in summer?
Not temperate trees with root pruning. Tropical trees can be repotted in early summer when warm.
How much root should I cut?
Up to about a third on healthy deciduous and tropical trees. Less on conifers and weak trees.
Do I need a new pot every time?
No. You can clean the old pot and use it again with fresh soil.
Should I water before or after repotting?
Both. Water the day before so the root ball is moist, and water thoroughly right after. The Wikipedia article on bonsai cultivation and care gives more background on repotting.
Final thoughts
Now you know how to repot bonsai: choose the right season, prepare the pot with mesh and wires, comb out and prune the roots, set the tree at the right angle, work fresh soil in with a chopstick, tie it in firmly and water well. Follow up with a few weeks of gentle aftercare, and your tree will reward you with healthy new roots and stronger growth. For more on daily care, see our bonsai care guide.