Slip Potting Bonsai: How to Move a Tree Without Root Pruning

This post contains affiliate links. As an Amazon Associate, OurBonsai earns from qualifying purchases at no extra cost to you. Read our disclosure.
In this guide
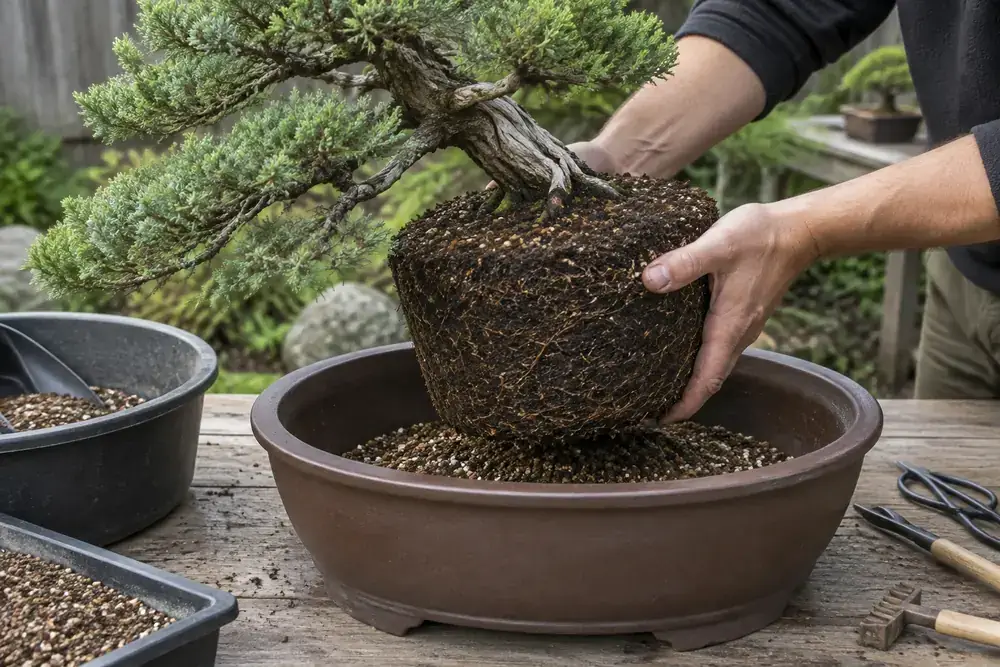
Slip potting bonsai is a gentle alternative to a full repot. Instead of combing out the roots and pruning them, you lift the whole root ball out of its old pot and set it, untouched, into a slightly larger pot with fresh soil around the sides. Because the roots are barely disturbed, the tree hardly notices. That makes slip potting useful in situations where normal repotting would be risky.
This guide explains when to slip pot, how it differs from repotting, and exactly how to do it.
What is slip potting?
Slip potting (sometimes called potting up) means transferring a tree to a new container with the root ball intact. Gardeners do it all the time with houseplants and nursery stock. In bonsai, it is used as a special-case technique, because most bonsai need regular root pruning to stay healthy in small pots.
| Slip potting | Full repotting | |
|---|---|---|
| Root pruning | None or very little | Yes, often up to a third |
| Old soil removed | No, only fresh soil added around | Yes, much of it |
| Stress on tree | Very low | Moderate to high |
| Timing | Almost any time in the growing season | Specific season, usually spring |
| Pot size | Usually larger | Often the same or smaller |
When to slip pot a bonsai
- Out of season. A tree badly root bound in summer that dries out several times a day can be slip potted into a larger pot to buy time until proper repotting in spring.
- Weak or stressed trees. A tree that cannot handle root pruning can be moved into fresh soil without losing any roots.
- Developing young trees. Moving a growing tree into a bigger training pot each year without root work lets it grow faster.
- Newly bought trees in tiny or poor pots, especially when it is the wrong season to repot.
- Collected trees that have just established and need more room.
- Trees you want to grow out to thicken the trunk.
When not to slip pot
- When the soil is compacted, rotting or waterlogged. Slip potting keeps the old soil, so the problem continues. A full repot is needed.
- When the tree is in development and you want to improve the nebari or root structure.
- As a permanent substitute for repotting. Eventually the old core of soil breaks down and must be replaced.
How to slip pot a bonsai
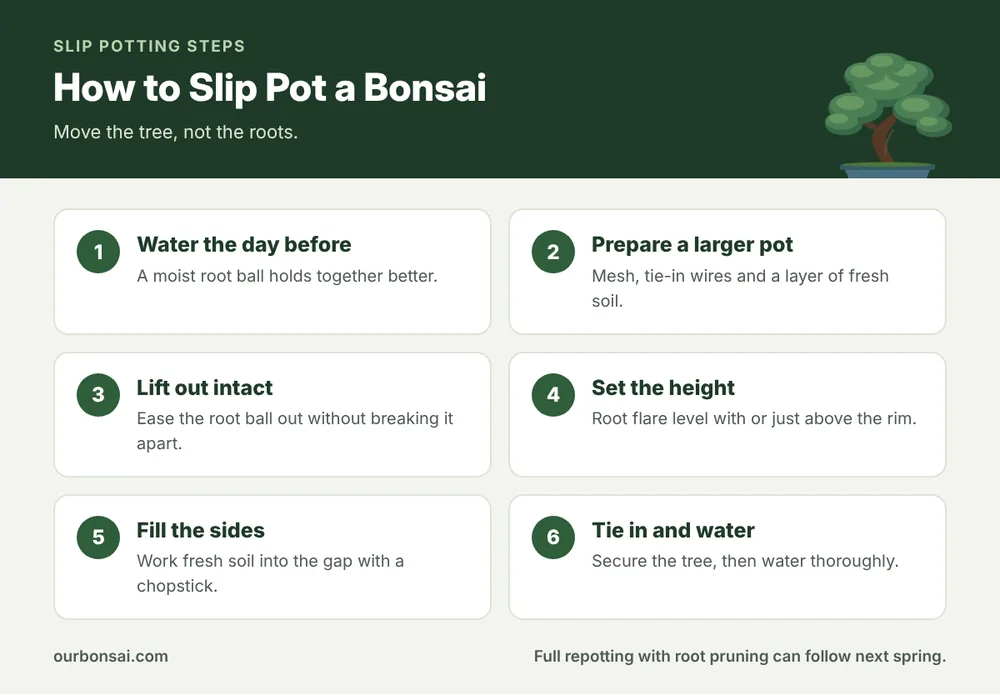
Step 1: Water the day before
A moist root ball holds together better and comes out of the pot more easily.
Step 2: Prepare the new pot
Choose a pot 2 to 5 cm wider and a little deeper than the current one. Cover the drainage holes with mesh, thread tie-in wires through, and add a thin layer of fresh, free-draining soil on the bottom. A Tokoname training pot or a deep training pot from our large deep bonsai pots review works well for development.
Step 3: Remove the tree intact
Cut any old tie-in wires. Run a thin knife around the inside edge of the old pot, then tip the pot and ease the tree out by the base of the trunk. Try to keep the root ball whole.
Step 4: Set the height
Place the root ball on the soil layer. The surface roots should sit level with or just above the rim. Add or remove soil underneath to adjust.
Step 5: Fill the sides
Pour fresh soil into the gap between the root ball and the pot. Use a chopstick to work it down so there are no air pockets. Do not push the chopstick into the old root ball.
Step 6: Tie in and water
Twist the tie-in wires over the root ball to secure the tree. Our guide to bonsai repotting wire explains how. Then water thoroughly until it runs from the drainage holes.
Aftercare after slip potting
Because the roots were not disturbed, aftercare is light:
- The tree can usually stay in its normal position. If it was in hot sun, a few days of light shade does no harm.
- Water carefully. The old root ball and new soil may dry at different rates. Check both by feel.
- You can continue feeding normally if the tree is healthy.
- Plan a full repot with root pruning at the next suitable season.
Choosing soil for slip potting
Use a good bonsai soil that suits the species, sieved to remove dust. Try to match the drainage of the old soil roughly. If the new soil is much coarser than the old, water will run around the old root ball instead of into it. Our guide to the best bonsai soil helps you choose. A repotting mat keeps the job tidy indoors.
Slip potting tropical trees
Tropical trees are often slip potted because they are bought in tiny pots at all times of year. If your new ficus or schefflera is in a cramped pot in winter, slip potting into a slightly larger pot can tide it over until late spring, which is the best time to repot tropical bonsai.
Slip potting as a development tool
For young trees you want to thicken quickly, many growers slip pot into progressively larger containers every year or two instead of root pruning. More soil means more roots, more growth above ground and a thicker trunk. Once the trunk is the size you want, you switch back to regular repotting with root pruning to build a fine, compact root system and fit the tree into a bonsai pot. It is a simple way to speed up the early years of a tree’s development without much risk. You can find plastic bonsai training pots on Amazon in many sizes for this purpose.
Common slip potting mistakes
- Using a pot that is far too large, which keeps soil wet for too long.
- Burying the trunk deeper than before.
- Leaving air pockets around the old root ball.
- Treating slip potting as a permanent replacement for repotting.
- Slip potting a tree with root rot instead of repotting it.
FAQ: slip potting bonsai
Can I slip pot a bonsai in summer?
Yes. That is one of its main uses. Because the roots are not disturbed, the tree can usually handle it at any time in the growing season.
How much bigger should the new pot be?
Usually 2 to 5 cm wider than the old one, and similar or slightly deeper.
Is slip potting bad for bonsai?
No. It is a gentle technique. It just does not refresh the soil around the core of the roots, so a full repot is still needed later.
Do I need to tie in a slip potted tree?
Yes. Any tree that can rock in its pot will damage new roots growing into the fresh soil. The Wikipedia article on roots explains how delicate new root tips are.
Final thoughts
Slip potting bonsai is the low-stress way to give a tree more room or rescue it from a cramped pot out of season. Keep the root ball intact, use a slightly larger pot with fresh soil around the sides, tie the tree in and water well. Then plan a proper repot with root pruning at the right time of year. For general care, see our bonsai care guide.