How to Seal Bonsai Cuts: When, Why and What to Use

This post contains affiliate links. As an Amazon Associate, OurBonsai earns from qualifying purchases at no extra cost to you. Read our disclosure.
In this guide
- Why seal bonsai cuts?
- Which bonsai cuts need sealing?
- Types of bonsai cut paste
- What not to use
- How to seal bonsai cuts step by step
- When to make cuts that need sealing
- Speeding up healing
- Sealing wounds after carving
- How the callus actually closes a wound
- Common sealing mistakes
- FAQ: seal bonsai cuts
- Final thoughts
Knowing when and how to seal bonsai cuts helps your tree heal quickly and keeps large wounds from leaving ugly scars. Every time you remove a branch, you create an open wound. Small cuts heal on their own, but larger cuts, especially on smooth-barked deciduous trees, can dry back, crack or heal with a raised lump. A good cut paste keeps the edges moist so the living tissue can roll over the wound evenly.
This guide explains which cuts need sealing, which products to use, how to apply them, and what to avoid.
Why seal bonsai cuts?
When a branch is cut, the tree responds by growing a callus, a ring of new tissue that forms at the edge of the wound and slowly rolls inward over it. On a bonsai, you want this to happen quickly and evenly, so the scar becomes invisible or nearly so.
Sealing helps by:
- Keeping the edges moist, which stops the bark and cambium drying back from the cut.
- Encouraging an even callus, so the wound closes flat instead of with a swollen ring.
- Reducing cracking of the exposed wood as it dries.
- Discouraging pests and fungus from entering the wound in some cases.
General arboriculture advice often says not to seal cuts on large landscape trees, as covered in the Clemson pruning factsheet. Bonsai is different: the goal is not only healing but a near-invisible scar on a small tree, which is why specialist bonsai cut pastes exist.
Which bonsai cuts need sealing?
| Cut | Seal? |
|---|---|
| Small twig cuts under about 5 mm | No, they heal on their own |
| Branch cuts wider than a pencil | Yes, on most species |
| Big chop on a trunk | Yes, always |
| Cuts on maples, beech, hornbeam, elms | Yes, they dry back easily |
| Cuts on junipers and pines | Optional; sap helps seal them |
| Deadwood (jin and shari) | No, this is meant to stay dead |
| Root cuts at repotting | Usually not; large root cuts sometimes |
Types of bonsai cut paste
There are two main kinds:
- Putty-style cut paste: A soft, clay-like paste that you press over the wound with a finger. It stays flexible and is easy to shape over concave cuts. Good for large wounds.
- Liquid or gel sealant: Comes in a tube or bottle with a brush or nozzle. Dries to a flexible film. Good for smaller cuts and fine branches, and faster to apply.
Many growers keep one of each. Our guide to a bonsai cut paste alternative compares common products and natural substitutes. You can also find bonsai cut paste on Amazon.
What not to use
- Tar or bitumen-based tree sealants made for large garden trees. They trap moisture, can damage living tissue and are almost impossible to remove from bonsai.
- Household glue or paint. Some contain solvents that harm bark.
- Thick layers of anything that hold water against the wood for months.
How to seal bonsai cuts step by step
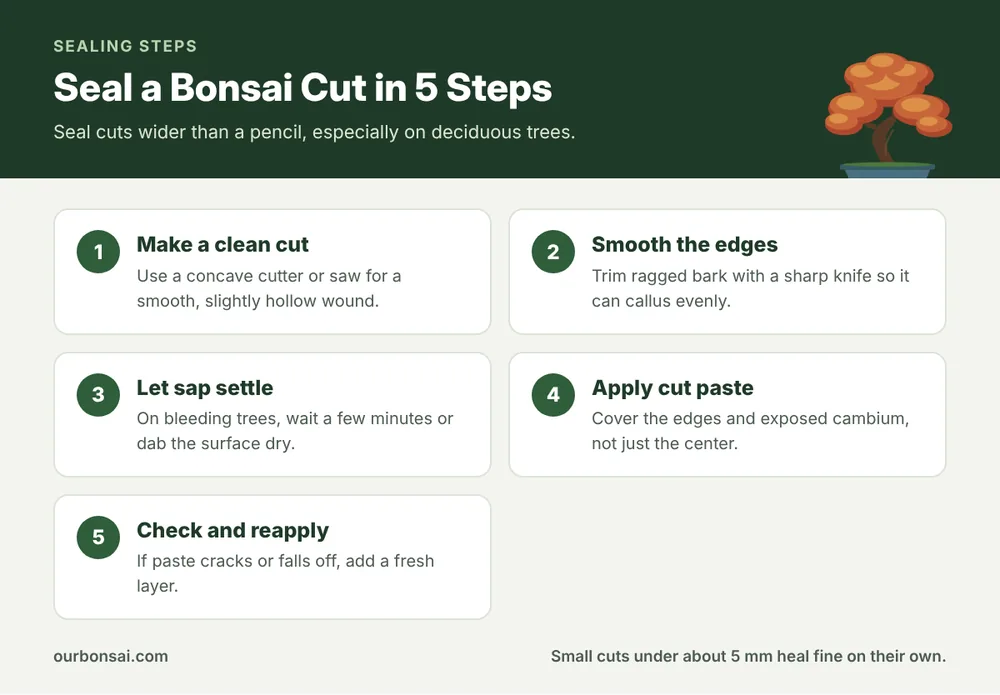
Step 1: Make a clean cut
A clean wound heals best. For branch removal, use a concave cutter, which leaves a slightly hollow cut that heals flat with the trunk. See our concave cutter review. For thick branches, use a fine bonsai pruning saw first.
Step 2: Smooth the edges
Ragged bark heals unevenly. Trim the bark edge with a sharp knife or a small carving tool so it is clean and smooth.
Step 3: Let sap settle
Some trees, such as maples in spring or ficus at any time, bleed sap. Wait a few minutes, or dab the surface dry with a clean cloth. Cut paste sticks better to a dry surface.
Step 4: Apply the paste
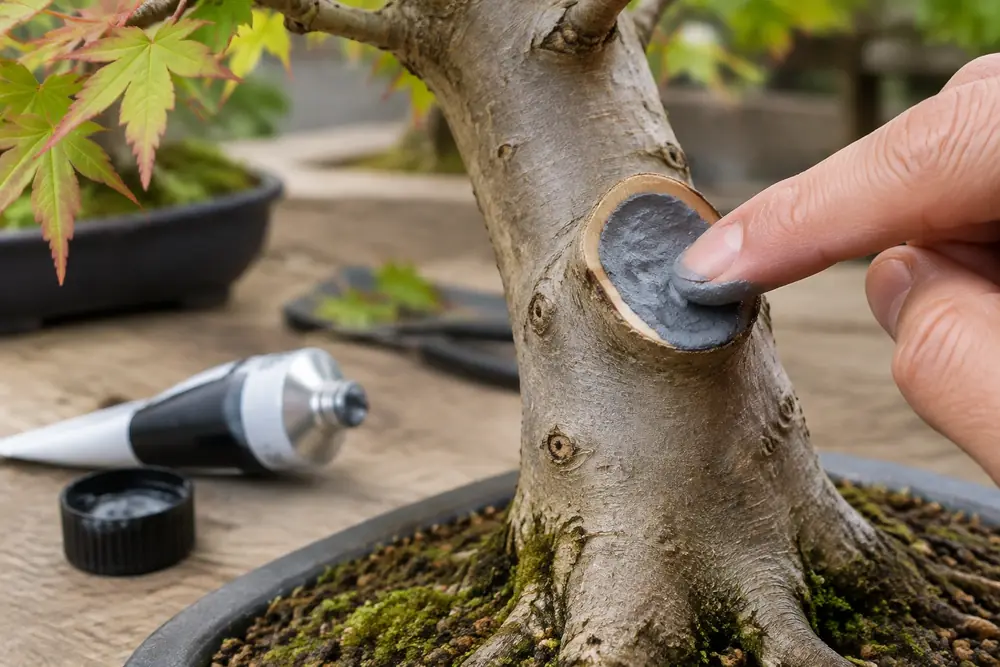
The most important part to cover is the edge of the wound, where the bark meets the exposed wood. That is where the cambium lives and where the callus will form. Press putty-style paste firmly over the whole cut, slightly overlapping the bark. With liquid sealant, brush it around the edge first, then over the center.
Step 5: Check and reapply
Over the following months, check the wound. If the paste cracks, shrinks or falls off, add a fresh layer. Many pastes gradually wear away as the callus grows over them, which is normal.
When to make cuts that need sealing
Timing affects healing as much as sealing does:
- Deciduous trees: Late winter to early spring, just before buds open. The tree heals fastest as it starts growing. Our guide on when to prune deciduous bonsai explains this.
- Conifers: Late autumn to winter for large cuts, when sap flow is lower.
- Tropical trees: During the warm growing season.
Avoid big cuts in late autumn on deciduous trees; they sit open all winter.
Speeding up healing
- Let the area above the cut grow freely. A branch or leader growing strongly near the wound feeds the callus.
- Feed and water well during the growing season.
- Give good light so the tree has energy to spare.
- Avoid wiring tightly around the wound area.
Large wounds can take several years to close completely, even on vigorous trees.
Sealing wounds after carving
When you carve hollows or reduce a large stub into a natural-looking scar, the same rules apply. Seal the living edges, leave the carved deadwood bare. A good bonsai carving tool gives you a smooth surface that heals better.
How the callus actually closes a wound
It helps to understand what you are trying to encourage. Just under the bark of every branch and trunk is a thin layer of growing cells called the cambium. When you cut, the cambium at the edge of the wound starts producing new tissue. This callus rolls slowly over the exposed wood like a lip, from all sides at once. If the edge dries out, the cambium dies back a few millimeters and the callus starts further away, making the wound larger and slower to heal. That is why the edges are the most important part to seal. On fast-growing trees in a good year, a callus can grow several millimeters, so a pencil-sized cut may close in one season, while a big chop wound can take three to five years.
Common sealing mistakes
- Sealing tiny cuts that would heal fine on their own.
- Covering only the center of the cut and missing the edges.
- Using garden tar products.
- Making cuts in the wrong season.
- Leaving a stub instead of a flush or slightly concave cut.
FAQ: seal bonsai cuts
Do I need to seal every bonsai cut?
No. Small cuts under about 5 mm usually heal fine. Seal larger cuts, especially on deciduous trees.
Can I use wood glue to seal bonsai cuts?
Some growers use non-toxic PVA wood glue as a cheap sealant on small cuts. Specialist cut paste is better for large wounds.
Should I seal cuts on junipers and pines?
It is optional. Their resin helps seal wounds naturally, but sealing large cuts on living wood can still help.
How long does cut paste stay on?
From weeks to several months. Reapply if it falls off before the wound has started to callus.
Final thoughts
To seal bonsai cuts well, start with a clean, slightly concave cut, smooth the edges, let the sap settle and cover the edges of the wound with a proper bonsai cut paste. Seal anything wider than a pencil on deciduous trees, skip the tiny cuts, and never use garden tar. With good timing and a strong, healthy tree, even large wounds can heal into smooth, barely visible scars. For the right cutting tools, see our guide to bonsai pruning shears.