Big Chop Bonsai: How to Cut Back a Trunk for Taper

This post contains affiliate links. As an Amazon Associate, OurBonsai earns from qualifying purchases at no extra cost to you. Read our disclosure.
In this guide
The big chop bonsai technique is exactly what it sounds like: you cut a thick trunk back hard, often removing most of the tree’s height in one go. It sounds brutal, but it is one of the most important tools for turning a straight, untapered nursery tree or field-grown trunk into a believable miniature tree. Done on the right species at the right time, the tree pushes new buds below the cut, and you grow a new, thinner leader that creates taper and movement.
This guide explains why growers use the big chop, which trees can handle it, when to do it, how to make the cut, and how to care for the tree afterward.
Why do a big chop?
Real old trees are thick at the base and taper gradually toward the top. Trees grown quickly in the ground or in large pots often have a thick trunk that stays the same thickness all the way up, with no taper. A big chop:
- Creates taper: a new, thinner leader grows from just below the cut and continues the line of the trunk.
- Adds movement: you can choose a new leader that bends in a different direction.
- Reduces height: bringing a tall tree down to bonsai proportions.
- Builds a thick trunk fast: growers often let a tree grow tall for years to thicken, then chop it.
Which trees can take a big chop?
Only trees that readily push new buds from old wood. Good candidates:
| Good for big chop | Avoid or be very careful |
|---|---|
| Trident maple, field maple | Pines |
| Chinese elm, Zelkova | Junipers |
| Ficus | Spruce, fir |
| Privet, Chinese privet | Most conifers |
| Hornbeam, beech (with care) | Weak or recently repotted trees |
| Pomegranate, olive |
Conifers such as pines and junipers generally do not bud from bare old wood. Cut below the last green foliage and the trunk dies back. They need different techniques, such as gradual reduction over several years. Our guide to the best trees to make bonsai lists vigorous species that suit hard pruning.
When to do a big chop
The best time is late winter to early spring, just before the buds open. At this point, the tree has stored energy in its roots and is about to push strong growth, so it can heal and back-bud quickly. For tropical trees such as ficus, chop in late spring or early summer when they are growing strongly.
Avoid big chops in autumn. The tree will not heal before winter and may die back further. Our guide on when to prune deciduous bonsai explains the reasoning.
How to do a big chop on a bonsai
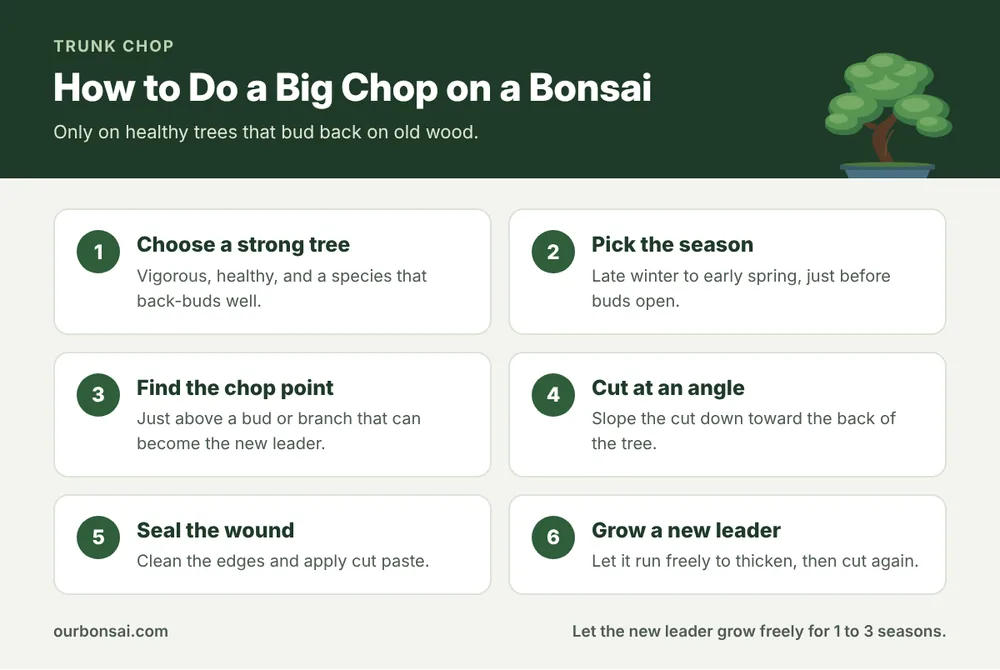
Step 1: Make sure the tree is healthy
Only chop a tree that grew strongly last season. Do not chop and repot heavily in the same spring.
Step 2: Decide the height
A common rule is to make the trunk roughly six times as tall as its base diameter for a powerful, compact tree, but this is only a guide. Look at the trunk for the best taper, movement and branch positions.
Step 3: Find the chop point
Cut just above a bud, small branch or point where you expect buds to form. Ideally there is a branch you can turn into the new leader. Leave a little extra length if you are unsure; some die-back below the cut is common.
Step 4: Make the cut
Use a sharp bonsai pruning saw for thick trunks. Cut at an angle, sloping down toward the back of the tree, so the cut faces away from the viewer. Then clean up the edges with a concave cutter or a knife.
Step 5: Shape and seal
On large cuts, many growers hollow the top slightly or carve the wound so it heals with a natural slope. A bonsai carving tool helps here. Then seal the edges with cut paste to stop the bark drying back. Our guide to a bonsai cut paste alternative lists suitable products.
Step 6: Let a new leader grow
When buds appear, choose one well-placed shoot near the top as the new leader. Let it grow freely, often for one to three seasons, so it thickens. Remove or shorten buds that compete with it.
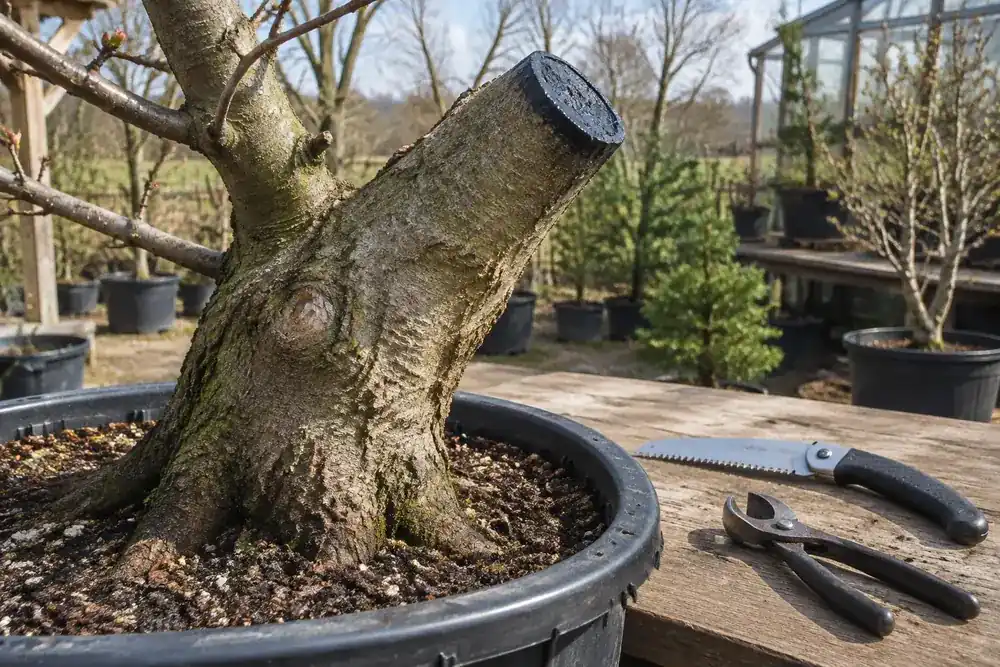
Aftercare after a big chop
- Keep the tree in full sun if it is a sun-loving species. Light triggers buds on old wood.
- Water carefully. With few or no leaves, the tree uses much less water at first. Do not keep the soil soggy.
- Feed once buds open, and then regularly through the growing season to fuel the new leader.
- Do not repot in the same season unless absolutely necessary.
- Be patient. Buds may take three to eight weeks to appear on some species.
Growing the new leader and healing the wound
As the new leader thickens, the wound from the big chop starts to roll over. Cambium grows in from the edges, forming a callus that slowly closes the cut. The thicker and faster the new leader grows, the quicker the wound heals. That is why many growers let the leader run long, sometimes to twice the final height, then cut it back to create the next section of taper.
This process can be repeated: chop, grow a leader, chop again. Each step adds a new section of trunk with more taper and movement. Our guide on how long it takes bonsai trees to grow gives realistic timeframes.
Tools for a big chop
- A fine-toothed folding pruning saw for trunks over about 2 cm.
- A concave cutter for cleaning the cut.
- A sharp knife for smoothing the bark edges.
- Cut paste.
- Optional: a rotary carving tool for shaping large wounds.
Common big chop mistakes
- Chopping a conifer below its last green growth.
- Chopping a weak tree or one that was just repotted.
- Cutting in autumn.
- Cutting flat, which leaves an obvious stump.
- Removing the new leader too early, before it has thickened.
- Leaving the wound unsealed on smooth-barked trees.
How to plan a big chop in advance
The best big chops are planned a year or more ahead. Grow the tree strongly in a large pot or in the ground the season before, with full sun and regular feeding, so it has plenty of stored energy. Photograph the trunk from several angles and mark possible chop points with a piece of tape or a marker. Look for a point where the trunk shows a slight bend or where small branches emerge, as these give you options for the new leader. Some growers also scratch a few buds into life the year before by pruning back the top lightly, so there is a branch ready when the big chop comes. Taking time to plan avoids rushed cuts that leave you with an awkward stump.
FAQ: big chop bonsai
Will my tree survive a big chop?
Healthy, vigorous deciduous and tropical trees that back-bud well usually do. Conifers often do not.
How long until new buds appear after a big chop?
Usually three to eight weeks in spring, depending on the species and weather.
How much of the trunk can I remove?
On strong trees, a lot, often more than half the height. Just make sure there is enough trunk left with healthy bark below the cut.
Do I need to seal the cut?
On large cuts, yes. It reduces die-back and helps the edges callus. The Clemson pruning factsheet explains how trees respond to large cuts in general.
Final thoughts
The big chop bonsai technique is a bold but proven way to create taper and movement in a thick trunk. Choose a healthy tree that buds back on old wood, cut in late winter or early spring at an angle just above a bud or branch, seal the wound, and let a new leader grow freely. With patience, a straight nursery stump can become the base of a convincing, characterful bonsai.